Build Your First AI Chat Assistant with Chatbase (No Code, Step-by-Step) in 5 minutes.
How to Create Your First Chatbot in 5 Minutes Using Chatbase (Step-by-Step Guide)
AI chat assistants are no longer limited to large companies or technical teams. Today, anyone can build a smart and reliable chatbot for their website in just a few minutes — without writing a single line of code.
One of the easiest and most powerful tools for this is Chatbase.
In this guide, you’ll learn exactly how to create your first AI chatbot using Chatbase, train it with your own content, deploy it, and embed it on your website. We’ll walk through the entire process step by step — from signing in to having a live chatbot ready to assist your users.
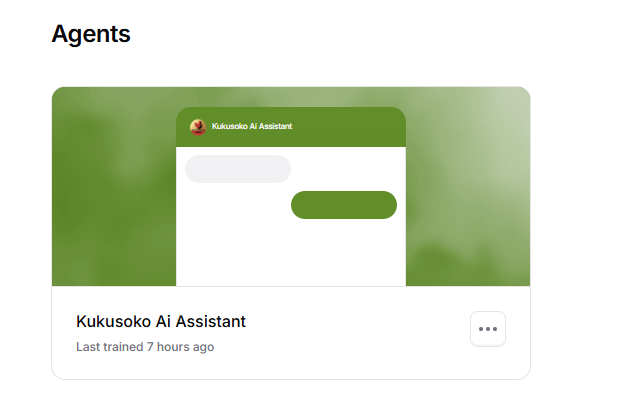
Step 1: Sign in and Access Your Dashboard
- Visit Chatbase.co
- Log in to your account
- If you don’t have one yet, sign up first.
- After logging in, you’ll be redirected to your Dashboard.
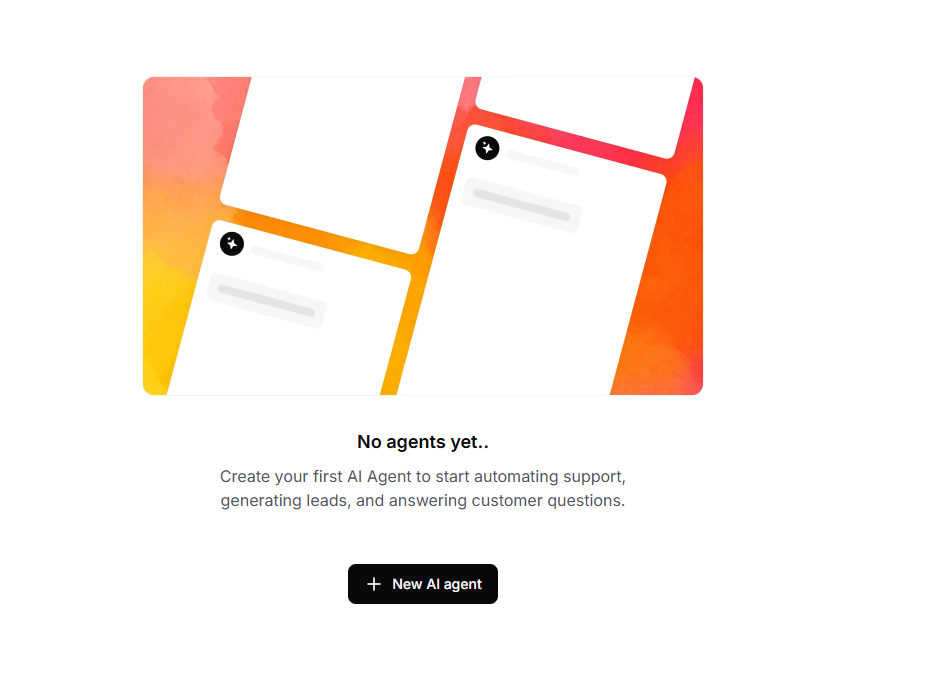
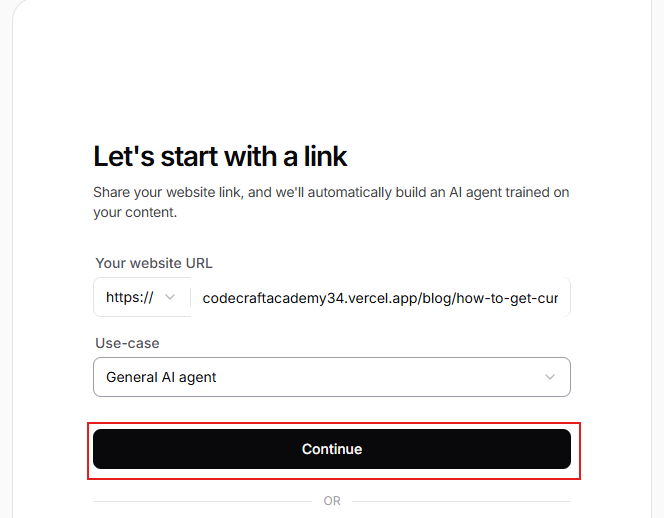
Step 2: Create a New AI Agent
-
From the dashboard, click New AI Agent
-
Enter your website url e.g google.com
-
Enter use-case (choose form the dropdown)
-
CLick Continue
Step 3: Add Training Data (What Your Agent Learns From)
Chatbase allows you to combine multiple data sources for better accuracy.
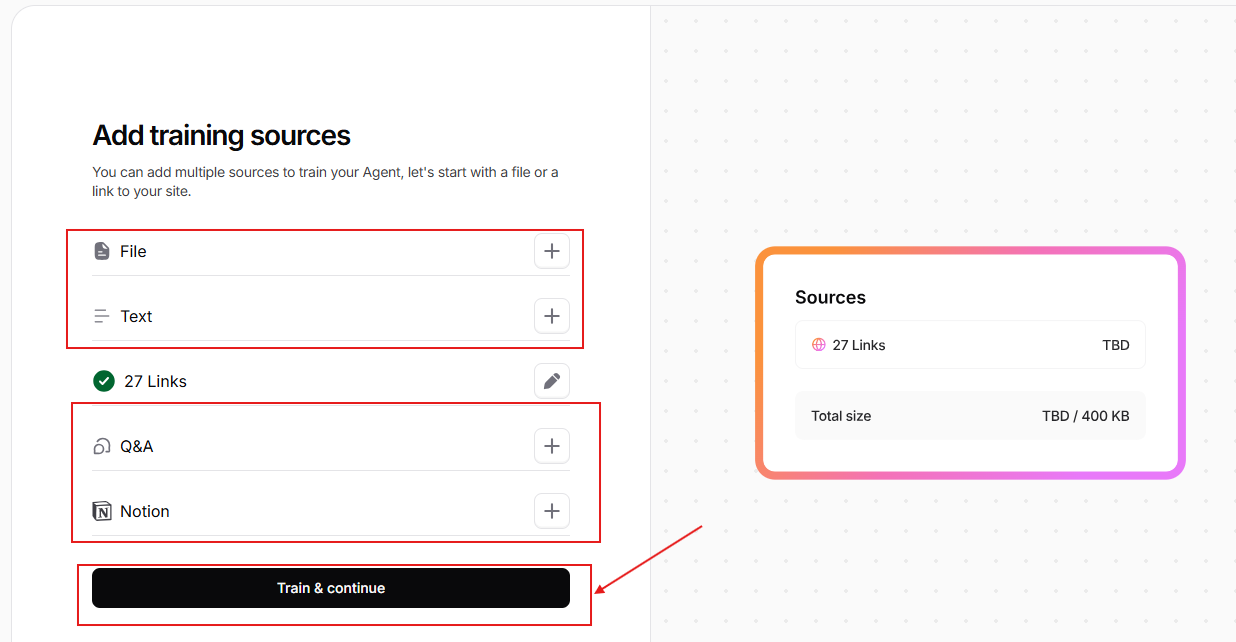
Available Source Types
📄 Files
- Upload PDF, DOC/DOCX, or TXT files
- Best for:
- FAQs
- Product documentation
- Policies
- Manuals
- Internal documents
🌐 Website
- Paste your website URL
- Chatbase can crawl linked pages and use their content for training or you can decided to proceed if you have seen chatbase has captured enough liks from you site or you can add the ones it has not captured.
📝 Raw Text
- Paste text directly
- Ideal for:
- Short descriptions
- Instructions
- Policies
- Custom notes
❓ Q&A
- Add specific questions with exact answers
- Best for:
- Very common questions
- Sensitive or critical answers where wording must be exact
🗂️ Notion
- Connect your Notion workspace
- Select pages to sync as training data
You can use one or multiple source types. Once done,
You will see all the sources you have uploaded and confirm if they are all available.
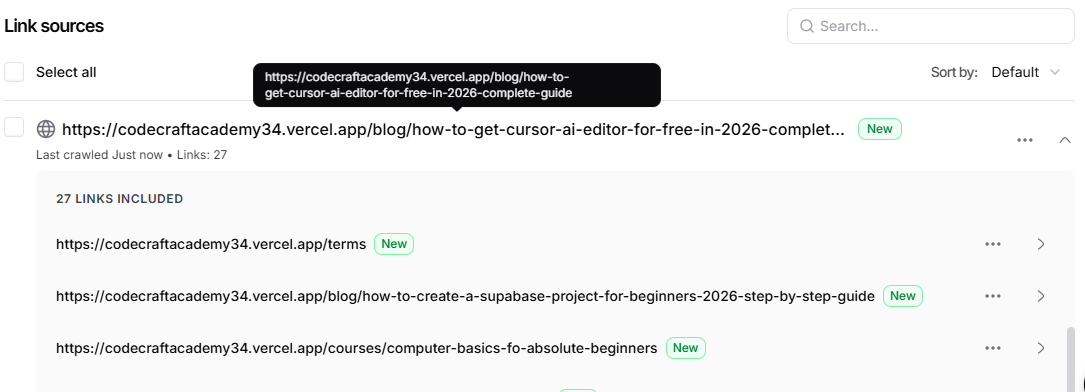
proceed to the next step.
Step 4: Review and Start Training
-
After adding your sources, click Train & Continue (or the confirmation button)

-
Training typically takes 2–5 minutes, depending on data size
Step 5: Configure Agent's UI(User Interface)
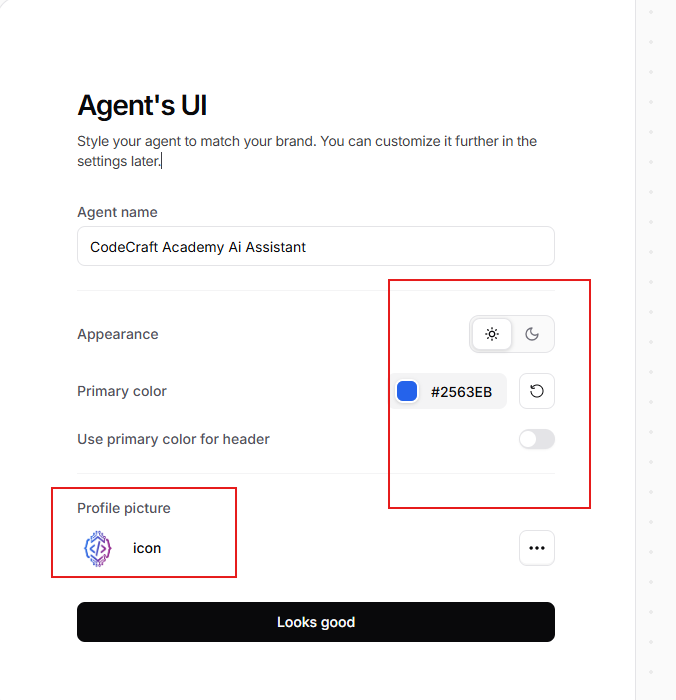
- Enter the Agent Name e.g Demo AI Assistant
- add you brand colors if it was not detect by chatbase
- Add your website logo
- Then click "Looks good"
Then you will be redirect to this page to choose your plan.
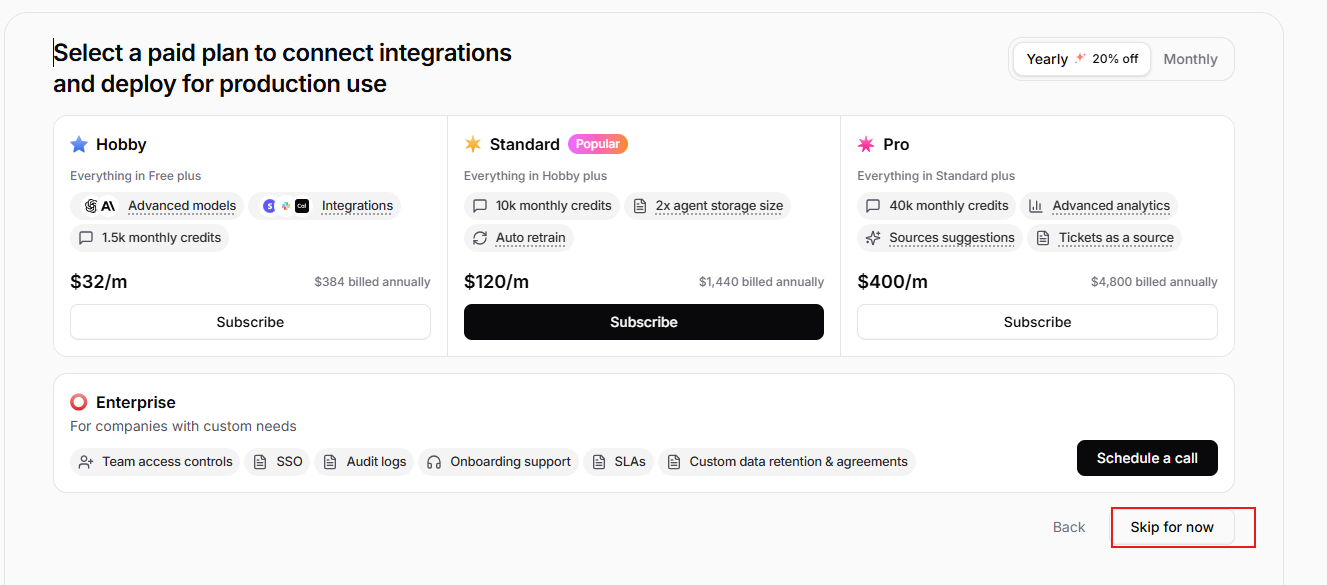
Click "Skip for Now"
Step 6: Test and Optimize in the Playground
- You’ll be taken to the Playground
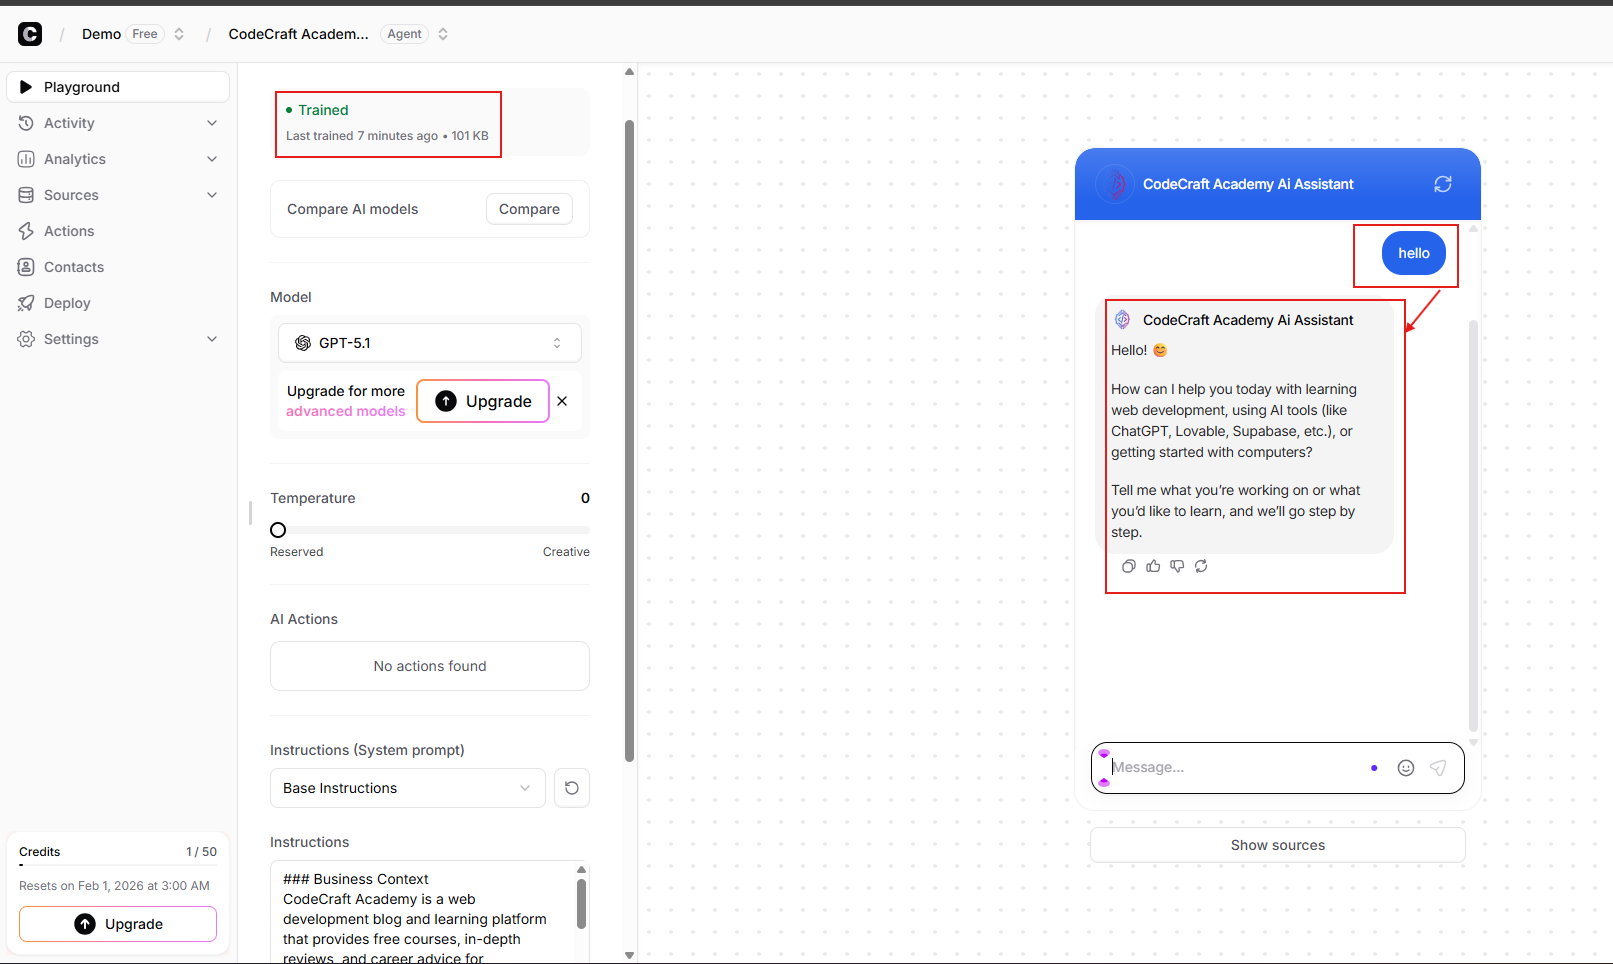
As you can see from the image above the status is showing "TRAINED"
Meaning you can;
- Chat with your agent as a real user would:
- Ask common customer questions
- Try edge cases or tricky queries
What to Check While Testing
- Accuracy – Are answers correct?
- Relevance – Does it respond to the actual question?
- Completeness – Not too short, not overly long
- Tone – Does it match your brand voice?
What You Can Adjust
- Agent Instructions (system behavior)
- AI model
- Temperature
- Lower = more factual
- Higher = more creative
- Add or edit training data and retrain
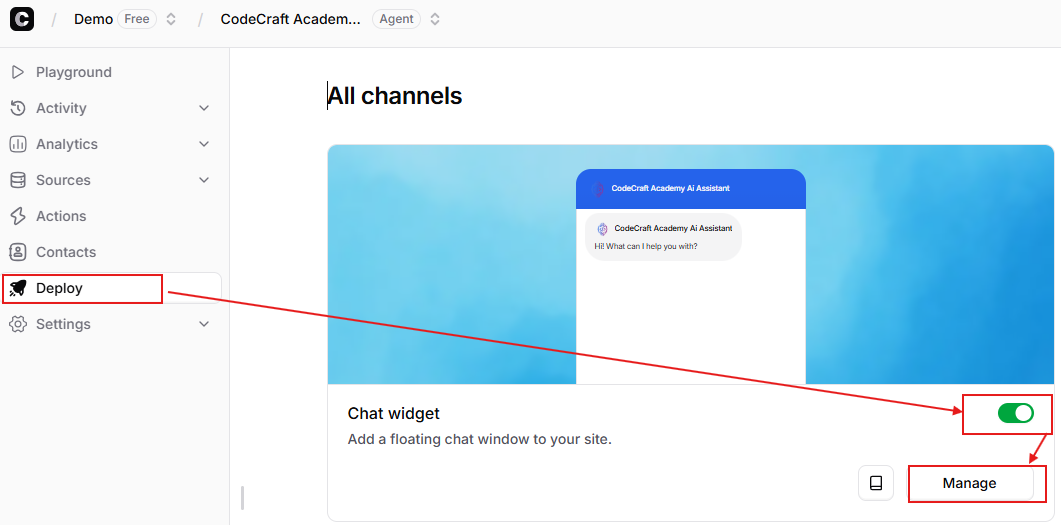
Step 7: Deploy the Agent on Your Website
-
Go to your agent’s page
-
Open the Deploy tab
-
Under Chat Widget, enable and click Manage
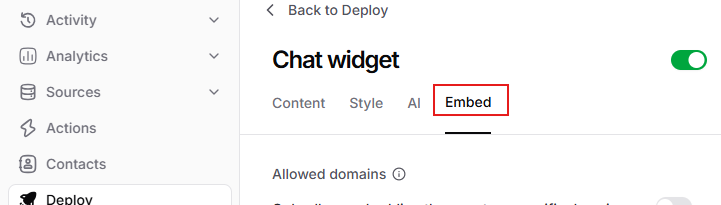
-
Go to Embed
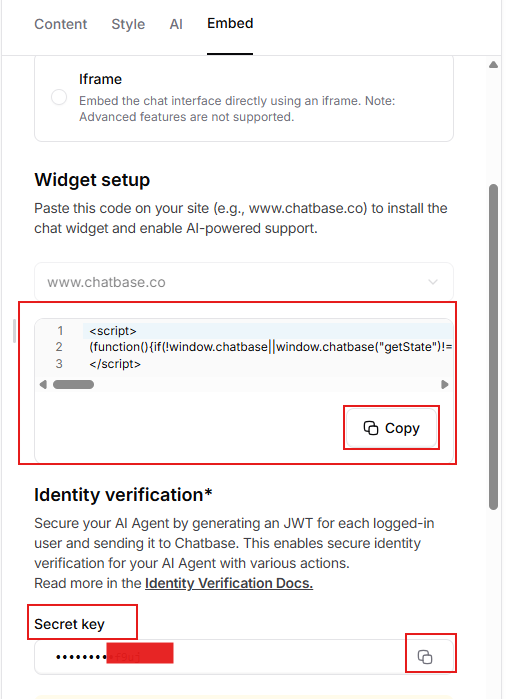
-
Select Chat widget and click Copy to copy the script and the Secret Key(store this in your .env file don't expose it or hardcord it.)
Embedding Options
Any Website / Custom Code
- Paste the script before the closing
</body>tag
WordPress
- Install the Chatbase plugin
- Go to Settings → Chatbase options
- Paste your Agent ID
- Found in your agent’s Settings tab in Chatbase
- Save changes
Bubble, Wix, Webflow
- Bubble: Add an HTML element and paste the embed script
- Wix / Webflow: Use custom code or embed options and paste the script
After embedding, open your site and confirm the chat widget appears.
You’re Done 🎉
Your Chatbase AI agent is now live and ready to assist users.
Get Started with Chatbase Today
If you’re ready to build your first AI chat assistant, you can start here:
👉 Create your first Chatbot using chatbase today : Create
This link supports my work and helps me continue sharing practical, real-world guides.
Happy building 🚀
Comments (0)
Leave a Comment
No comments yet. Be the first to comment!